How to Change the Color of Specific Words or Text in Elementor
Hello web designer. Want to make key phrases pop and draw attention on your website? Highlighting important information, reinforcing your brand, and improving readability are all essential parts of effective web design. While Elementor makes it easy to style your entire heading or paragraph, you might find yourself stuck when you just want to change the color of a single word or phrase, especially if you are using the free version.
If you’ve ever found yourself wishing you could give one word a unique color to match your brand or make a statement, this tutorial is for you. Although Elementor doesn’t offer a built-in “partial text color” option, there’s a simple method to achieve this using a little custom CSS. Don’t worry, you don’t need to be a developer or know how to code to follow along.
This tutorial will guide you through two simple, beginner-friendly methods to change the color of specific text in Elementor. We’ll start with the quickest fix for one-off changes, then move on to a more professional, scalable method using CSS for when you need consistent, site-wide branding. By the end, you’ll be able to add a polished and engaging touch to your website’s design.
Before You Begin: What You’ll Need
Before we dive in, let’s quickly go over what you need to get started. This method is compatible with both the free and pro versions of Elementor.
- A WordPress website with the Elementor plugin installed.
- Access to your WordPress Dashboard to edit pages and add CSS.
- An Elementor Text Editor or Heading widget.
Method 1: The Quick & Easy Way (Inline HTML)
This method is perfect for one-off instances where you just need to change the color specific words or text. It’s fast, simple, and doesn’t require any custom CSS.
- Open your page in the Elementor editor and select the Heading or Text Editor widget you want to modify.
- In the widget’s content panel, find the text you want to change.
- Wrap the specific word or phrase in a
<span>tag with an inlinestyleattribute.
Here is the HTML code you will use:
<span style="color: #FF7F50;">Your Text</span>You can change the color code to your preferred color or use a color name instead. For example, replace #FF7F50 with your desired color code (like #00BFFF) or a simple color name such as red, blue, or green.
Let’s use an example. If your heading is “The Best Digital Marketing Agency,” and you want to change the color of “Digital Marketing,” your code will look like this:
The Best <span style="color: #FF7F50;">Digital Marketing</span> Agency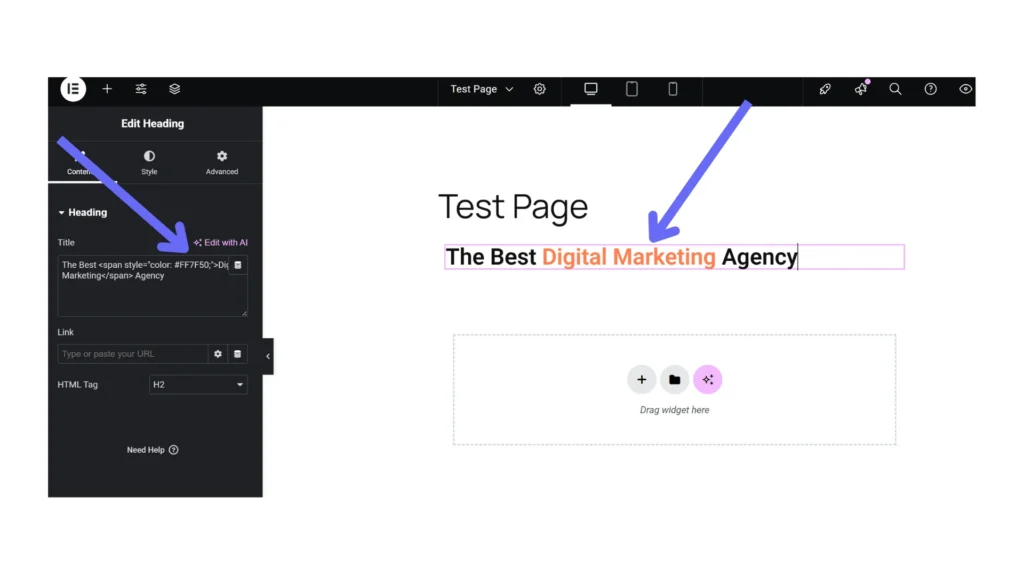
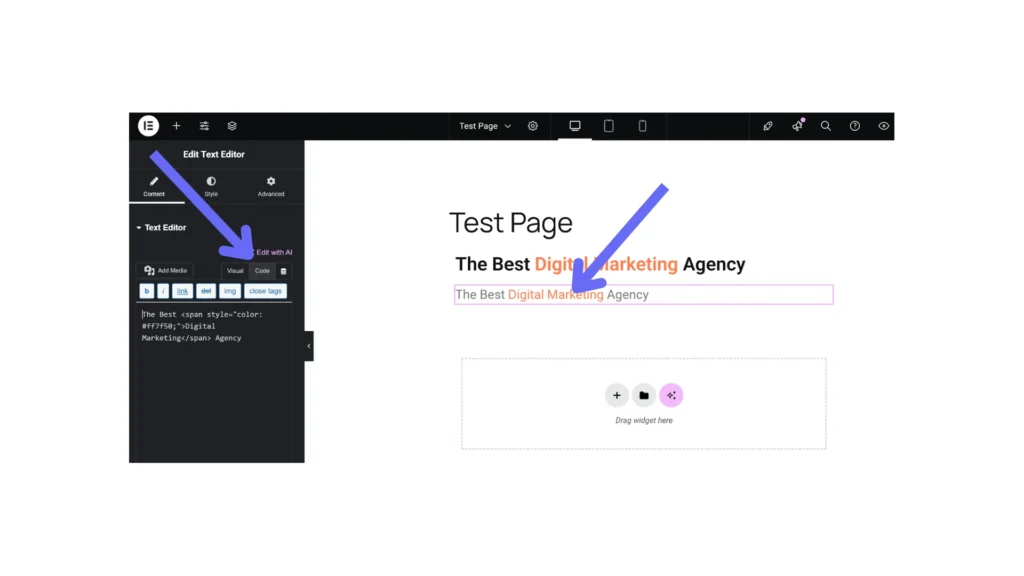
Pro Tip: For the Text Editor widget, make sure you are in the Code tab, not the Visual tab. The Visual tab is for rich text editing and will not render the code correctly.
Method 2: The Professional & Scalable Way (Custom CSS)
This method is for web designers and users who want a more organized and scalable approach. Instead of styling each text individually, you create a reusable CSS class. This is especially useful if you want to apply the same brand color to multiple words or phrases across your entire website. If you ever need to change that color in the future, you only have to edit it in one place!
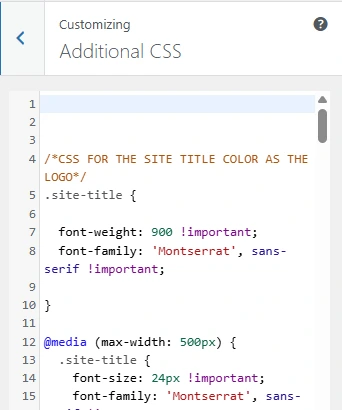
If you’re using Elementor Free, you’ll need to add the CSS to your theme’s Customizer. Most popular themes like Astra, Kadence, and Blocksy support this. You can check by going to Appearance > Customize > Additional CSS in your WordPress dashboard.
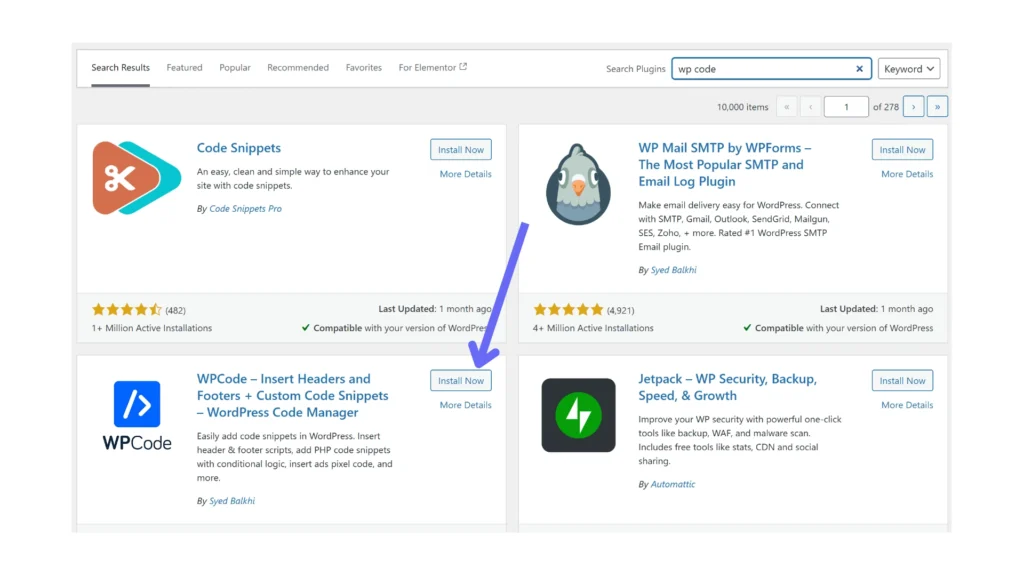
Alternatively, you can also use a plugin such as WPCode, Simple Custom CSS, or SiteOrigin CSS to add your custom styling easily. I would recommend using WPCode, since it supports adding code in multiple languages – including CSS, JavaScript, PHP, and HTML, all from one clean interface.
To add custom CSS using WPCode, install and activate the plugin from your WordPress dashboard by going to Plugins > Add New and searching for “WPCode.”
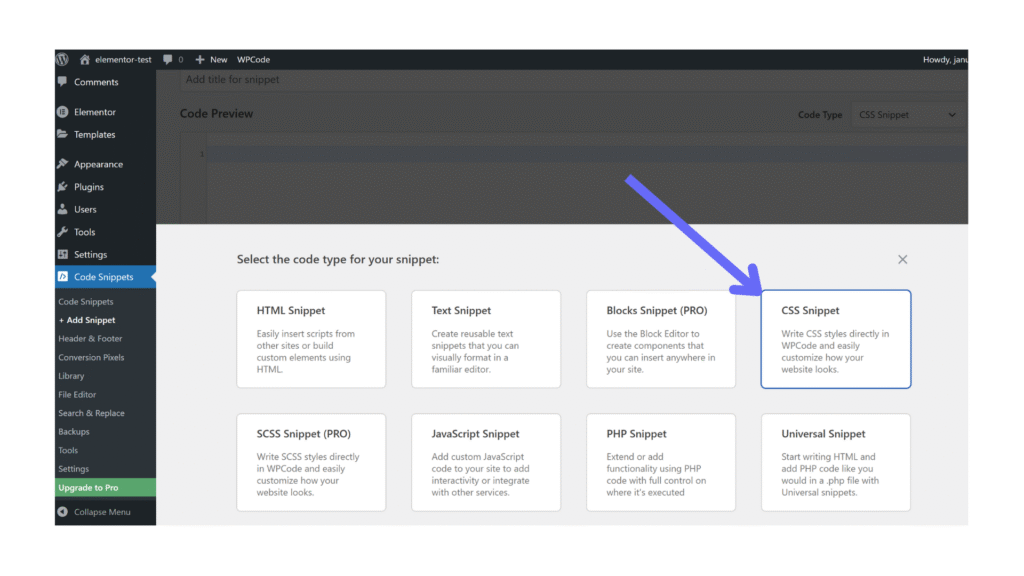
Once activated, navigate to Code Snippets > Add Snippet, then click Add Your Custom Code (New Snippet). Choose CSS Snippet as the code type and paste your CSS inside the editor box. Give your snippet a descriptive title, such as Elementor Text Color Styles. Finally, toggle the snippet to Active and click Save Changes. Your custom CSS will now be applied across your site safely and efficiently.
If you’re using Elementor Pro, you can add the CSS directly within the Elementor editor under Advanced > Custom CSS.
Step 1: Wrap Your Text in a <span> with a Class
First, we need to mark the text we want to style with a CSS class.
- Open your page in the Elementor editor and select the Heading or Text Editor widget.
- In the content panel, wrap the specific word(s) in a
<span>tag with a descriptiveclassattribute.
Here is the HTML code:
<span class="highlight">Your Text</span>For our example, “The Best Digital Marketing Agency,” your code would look like this:
The Best <span class="highlight">Digital Marketing</span> AgencyYou can name your class anything you want, such as brand-color, special-text, or key-phrase. Just make sure it’s something you’ll remember.

Step 2: Add the CSS Code
Now that you’ve added the <span> tag and class name to your text, it’s time to define the color for that class.
If you’re using Elementor Pro, open the same widget you’re editing, go to Advanced > Custom CSS, and paste the following code:
.highlight {
  color: #FF7F50;
}
If you’re using Elementor Free, go to your WordPress Dashboard > Appearance > Customize > Additional CSS, then paste the same code there. You can also open WPCode by navigating to Code Snippets > Add Snippet, choose CSS Snippet, and paste the same code inside; just as I explained above. Then, save and activate your snippet to apply the color site-wide.
Don’t forget to include the dot (.) before your class name in the CSS code. For example, .highlight { color: #FF7F50; }. The dot tells CSS that you’re targeting a class, not a tag, ensuring that the style is applied correctly to any text wrapped in that class.
You can change the color code to your preferred shade or use a named color instead. For example, replace #FF7F50 with any other color code or name like #00BFFF, red, or green.
Once you publish the changes, preview your page. The word or phrase wrapped in the <span class="highlight"> tag will now display in your chosen color.
Bonus Tips & Next Steps
- Consistency is Key: Use the custom CSS method (Method 2) to maintain a consistent color palette across your website. This reinforces your brand identity and makes your site look more professional.
- More than just color: Want to make your text even more eye-catching? You can use advanced CSS to add effects such as gradients or hover transitions. For example:
.highlight {
  background: linear-gradient(to right, #FF7F50, #FFA800);
  font-size: 18px;
  font-weight: 700;
  cursor: pointer;
  -webkit-background-clip: text;
  -webkit-text-fill-color: transparent;
  transition: all 0.3s ease;
}

.highlight:hover {
  color: #00BFFF;
}
Conclusion: Elevate Your Design with Simple Styling
Whether you choose the quick inline method or the more robust CSS class approach, changing the color of specific words is a powerful way to add visual hierarchy and polish to your Elementor pages. It’s a small design detail that can make a big difference, drawing your visitors’ attention to key information and creating a more engaging user experience. Now go ahead and make your words shine!